Thursday, 18 March 2010

MP5k Update

Last time I said I bought a Galaxy MP5k in bits for next to nothing. Just a quick update to say I've managed to put it all together. I'm really pleased because this my first AEG/gearbox build and it went smoothly. Well, aside from the small amount soldering I had to do because I messed up the AK wiring loom that came with it, partly because the wires weren't long enough to wire the MP5k up the way it was intended and party because I'm a clumsy oaf. She does fire, although the RoF is slow I think that's down to a rubbish motor. Can't wait to get some mags to try her out properly. Might use her on my first night game on the 10th April.


I'll probably be getting these mags to keep the overall price down as a super cheap gun:
I'm also thinking of getting a high speed motor to get a nice RoF out of her:
It also came with a Vanaras tight bore barrel intended for a full sized MP5, I was thinking of putting a silencer on and running the tight bore through it:

If anyone ever reads this, what do you think?


- Wisey

Monday, 15 March 2010

AC 13th March

Had a great day on Saturday at Airsoft Commando, good number of people and everyone played well. Got to try out my Russian LES BDU for the first time as it arrived on the Friday beforehand. Couldn't be happier with it, I didn't managed to get a picture of me in it but I took a quick photo of it that I was going to use on a forum.


It's very comfortable and kept me warm while stood around in the safezone while keeping me cool on the field. Got it from Red Forces Warehouse (www.redforces.com) along with the patch and a Telnyashka to go underneath it.

While I was at the site I bought a Galaxy MP5k in bits from a guy whose part of the AC team called Sam. £25 for the whole lot, very pleased, will be more pleased when I managed to put it all together. The stick battery I have does fit into the gun, but when it's in the gun the cocking handle can't be pulled back, not that that is really a problem on AEG's...


- Wisey

Saturday, 6 March 2010

Custom Sensei Half Face

I thought I'd do a write up for my custom made half face mask. All you need for this is a Sensei mesh full face mask and a few basic tools. I find there aren't enough airsoft full or half face masks on the market with proper lenses as opposed to mesh ones. So I decided I'd make my own. What you will need:
  • Sensei face mask or Chinese clone
  • Wire/plastic cutters
You may also need, depending on your mask and what exactly you want to do with it:
  • Pliers
  • Power drill (or cutters again, with some persistence)
  • E-tape
  • Draft excluder strip/sticky back foam
Firstly you're going to grab your Sensei face mask and separate the goggles from the lower half. On some more masks this will be easy as the plastic clips will just pull out, on others (such as the very cheap on I used) the two halves will be riveted together, it should be fairly simple to get the rivets out with a pair of pliers just be careful to not damage the mask. Once you've got the rivets/clips out your mask should look something like this:


Next you need to pull out the tabs that connect the mask to the goggles where the strap is, like so:


Once that is done you should be able to completely remove the goggles. Then you just need to take the strap off the goggles. I found it easiest to twist the strap fastenings forward and then un-hook them from the goggles.


Now the goggles are completely removed from the lower part of the mask and the strap and can be put to one side.


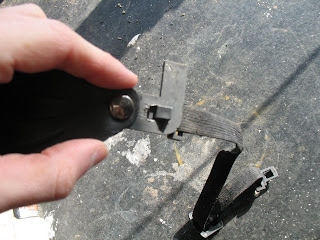
Now comes a choice, you can either remove the limbs that are connected to the mask. I would advise you do this the fastenings are poor quality. The strap can then be either hooked through the holes on the mask or replaced with a a different strap and tied through holes. Alternatively you could reinforce the connection with glue or e-tape. The connections on my mask were big rivets and are more than strong enough. If you are looking to exactly the same as me then I suggest you buy on of the very cheap masks from ebay. Mine was the cheapest one I could find and came to less than £5 posted. So the next thing you need to do is drill a hole in the limb to hook your strap through, as I mentioned at the start you could probably achieve the same thing with your plastic/wire cutters and come persistence.


You can then simply hook the strap though the hole, the smaller you can keep the hole the better so the strap won't fall out.


Then cut the limb down so the strap sits tight on the end, you could reinforce again with e-tape or glue. However I found no need for this as the it held very well by itself.


Now your mask should be pretty much finished. You may want to use your draft excluder strips or foam to pad the mask and make it more comfortable. I trimmed the top of the nose a bit to make it sit better on my face.


So there we have it, not the most comfortable mask in the world (I think with some more padding and maybe some trimming it would be much more so) but is very cheap, light, low-profile and easy to breath through. Here are a few pics of it on me, the first pic it is too far up my face, I adjusted the padding before trying it with goggles, I didn't have any shooting glasses to hand to try with it but I assure you they would work fine with this mask:


- Wisey